Discover the Magic of Homemade Rolls with Your Bread Machine
There's something uniquely comforting about the aroma of freshly baked bread filling your home. During times when the world feels a little overwhelming, retreating to the kitchen and creating something delicious can be a powerful antidote. And what could be more comforting than a batch of soft, pillowy, homemade dinner rolls? With the help of your trusty bread machine, achieving these culinary wonders is no longer a daunting task, but a surprisingly simple pleasure.
Say goodbye to endless kneading and complex rising schedules. Our recipe for fluffy bread machine rolls promises minimal effort and maximum flavor, delivering melt-in-your-mouth goodness that tastes remarkably like those beloved Hawaiian sweet rolls you find in stores. Imagine slathering them with a generous pat of butter or a dollop of your favorite jam – pure bliss!
This isn't just a recipe; it's an invitation to experience the joy of baking without the stress. Your entire family will gobble these up, making them a perfect addition to any meal, holiday spread, or simply as a delightful snack. Let your bread machine do the heavy lifting, and prepare to be amazed by the delicious results.
Why Your Bread Machine is Your Best Friend for Fluffy Rolls
The bread machine truly shines when it comes to making dough for rolls. It automates the most time-consuming and labor-intensive parts of bread making: mixing and kneading. This means you get a consistently smooth, perfectly developed dough without ever getting your hands sticky. Beyond the sheer convenience, there are several benefits to letting your bread machine handle the dough:
- Hands-Off Convenience: Simply add your ingredients, press a button, and walk away. The machine handles the precise timing for mixing, kneading, and often, the first rise.
- Consistent Results: Bread machines maintain optimal temperatures for yeast activation and dough development, leading to reliable, perfectly risen dough every time.
- Less Mess: All the mixing and kneading happen within the machine's pan, keeping your counters clean and tidy.
- Perfect Dough Texture: The consistent kneading action of the bread machine helps develop the gluten in the flour, which is crucial for achieving that desirable soft and chewy texture in your fluffy bread machine rolls.
For those looking to master the art and science behind these delectable rolls, exploring Perfect Fluffy Bread Machine Rolls: Pro Tips & Pantry Staples can provide even deeper insights into getting the best results every time.
Simple Ingredients for Extraordinary Fluffy Bread Machine Rolls
One of the best aspects of this recipe is that it relies on common pantry staples. You likely have most, if not all, of these ingredients in your kitchen right now, making it incredibly easy to whip up a batch whenever the craving strikes.
- Milk: We recommend whole milk for its richness, which contributes to the rolls' soft texture and flavor. However, skim milk works perfectly fine too if that's what you have on hand. Warm milk helps activate the yeast.
- Bread Flour: This is key! Bread flour has a higher protein content than all-purpose flour, which means it develops more gluten. More gluten equals a chewier, more elastic dough, essential for those truly Easy Fluffy Bread Machine Rolls: Homemade Hawaiian Sweet Taste and an airy crumb.
- Sugar: Not just for sweetness, sugar feeds the yeast, helping it activate and produce carbon dioxide, which gives the rolls their rise. It also contributes to the beautiful golden-brown crust.
- Salt: Essential for flavor balance, salt also helps regulate yeast activity and strengthens the gluten structure.
- Butter (Melted): Adds incredible richness, tenderness, and that signature buttery flavor that makes these rolls irresistible.
- Active Dry Yeast: The leavening agent that makes your rolls light and airy. Ensure your yeast is fresh for the best rise!
Crafting Your Fluffy Bread Machine Rolls: Step-by-Step
The beauty of this recipe lies in its simplicity. Let your bread machine do the heavy lifting, and you'll be rewarded with delightful homemade rolls.
1. Loading Your Bread Machine
First things first: consult your specific bread machine's manual for the recommended order of ingredients. While most machines follow a similar pattern (liquids first, then dry ingredients, with yeast last and sugar/salt separated), variations exist. Incorrect layering can sometimes affect how the ingredients are incorporated and thus the final dough.
For many common bread machines, the order is:
- Milk
- Bread Flour
- Sugar
- Salt
- Melted Butter
- Active Dry Yeast (placed on top of the flour, away from liquids and salt initially)
Select the "Dough" cycle on your bread machine. This cycle typically mixes, kneads, and provides the first rise for the dough. Let it run its complete course, which usually takes between 1 hour 30 minutes to 2 hours.
2. From Dough Ball to "Snuggle Balls of Happiness"
Once the bread machine finishes its cycle, open the lid. You should be greeted by a beautifully smooth, elastic, and well-risen ball of dough – a truly fluffy sight! Carefully remove the dough from the pan onto a lightly floured surface. Using your fingers, gently press down to deflate the dough, releasing the trapped air.
This recipe yields approximately 16 rolls, a perfect number for a family meal or to share. To divide the dough evenly, a simple trick is to first tear or cut the large dough ball into four equal pieces. Then, divide each of those four pieces into four smaller, roughly equal portions. Aim for pieces that are about 1.5 to 2 ounces each for standard dinner rolls.
Shape each piece into a smooth, round ball. A good technique is to gently tuck the edges underneath, forming a taut surface on top, then roll it lightly between your palms or on the counter until smooth. Place these dough balls into a greased baking pan, leaving a little space between each to allow for their second rise.
3. The Second Rise: Patience is a Virtue
Once your rolls are nestled in their pan, cover them loosely with a clean kitchen towel. Allow them to rise in a warm, draft-free spot for about 1 hour, or until they have visibly doubled in size and look puffy and soft. They'll look like little soft snuggle balls of happiness, just waiting to be baked!
Pro Tip: To create a warm, humid environment for rising, you can preheat your oven to its lowest setting (around 170°F/75°C) for just a few minutes, then turn it off. Place a pan of hot water on the bottom rack for steam, and then place your covered rolls inside. Be sure the oven is off and not too hot!
4. Baking to Golden Perfection
Preheat your oven to 350°F (175°C). Once the oven is hot and your rolls have completed their second rise, place the baking pan into the preheated oven. Bake for 16-18 minutes, or until the tops are beautifully golden brown. The internal temperature of a perfectly baked roll should be around 200-210°F (93-99°C).
Once baked, remove the rolls from the oven. Resist the urge to dive in immediately! Allow them to cool for a few minutes in the pan, then transfer them to a wire rack to cool slightly more. Eating them warm, however, is highly recommended – just be careful not to burn your mouth!
To Egg Wash or Not to Egg Wash? That is the Question!
When it comes to the final finish, there are two popular camps. Some bakers swear by an egg wash (one egg whisked with a tablespoon of water or milk) for a glossy, deep golden crust. Others prefer a simpler, equally effective approach.
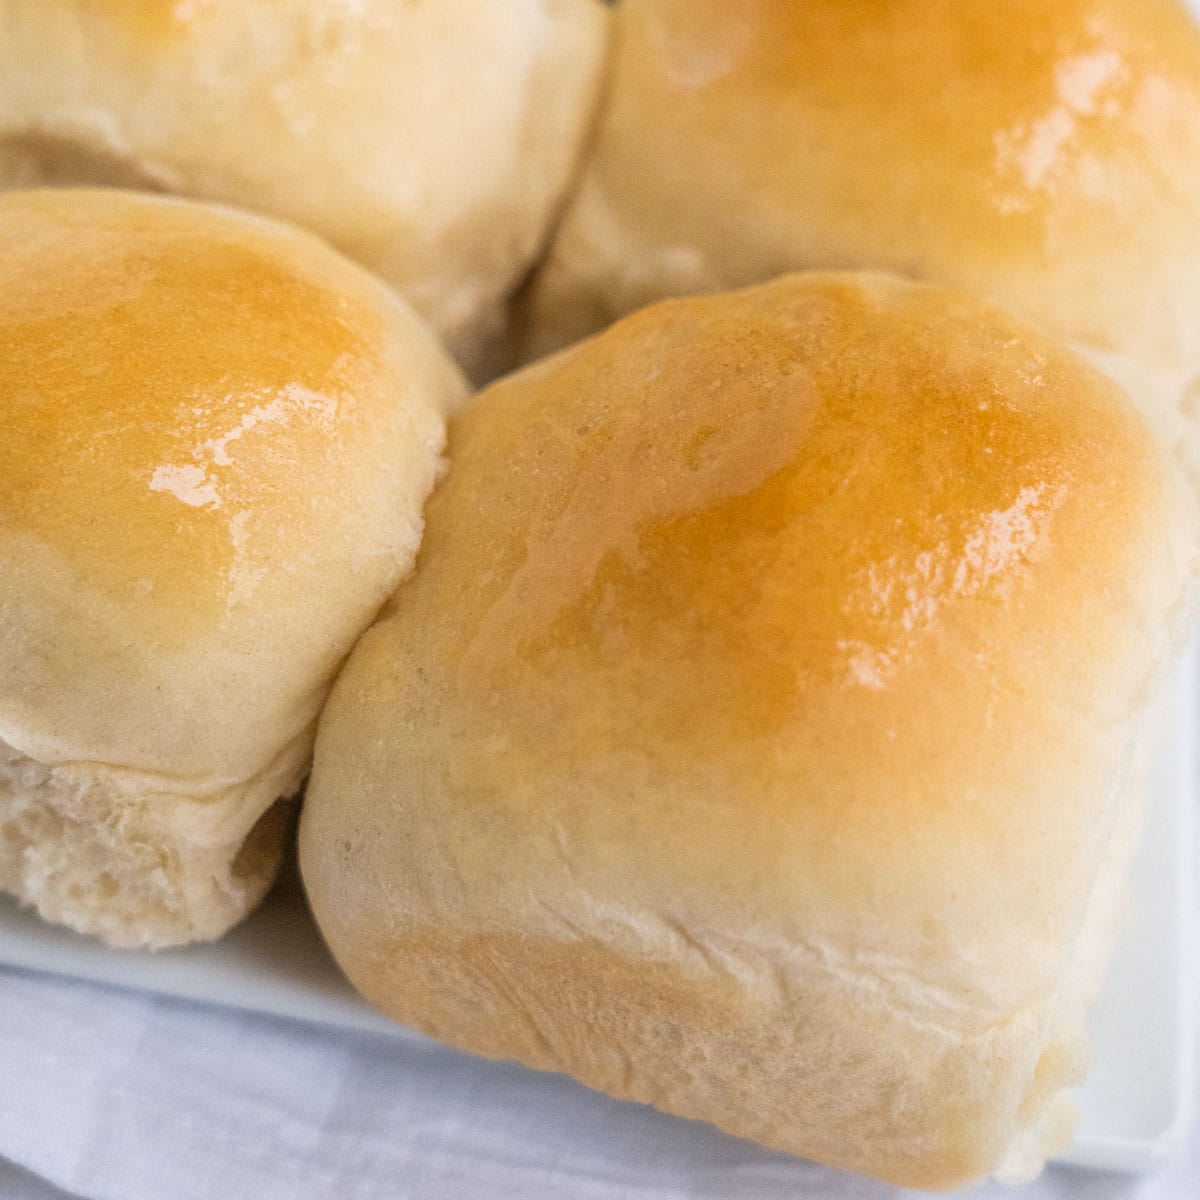
For these fluffy bread machine rolls, we lean towards skipping the egg wash. Instead, immediately after they come out of the oven, take a stick of butter (or melted butter in a brush) and lightly brush the tops of the warm rolls. This simple step not only imparts a beautiful, buttery sheen but also infuses them with an extra layer of rich flavor. It’s a trick that makes them utterly irresistible and enhances that homemade Hawaiian sweet roll taste.
Freezing Your Fluffy Rolls for Later Enjoyment
While it might be a challenge not to devour these delicious rolls within the first day, they also freeze beautifully for future indulgence. Once baked and completely cooled, place the rolls in a single layer on a baking sheet and flash freeze for about an hour until firm. This prevents them from sticking together. Then, transfer the frozen rolls to an airtight freezer-safe bag or container.
They will keep well in the freezer for up to 2-3 months. When you're ready to enjoy them, simply thaw at room temperature and warm them slightly in a preheated oven (around 300°F/150°C) for 5-10 minutes, or until heated through. They'll taste almost as fresh as the day they were baked!
Conclusion: Effortless Delight Awaits
There you have it – a straightforward path to creating incredibly soft and fluffy bread machine rolls with minimal fuss. Your bread machine truly is a secret weapon for effortlessly producing bakery-quality results right in your own kitchen. Whether you're serving them with a holiday feast, alongside a comforting weeknight dinner, or simply enjoying them smeared with butter and jam, these homemade rolls are a testament to how easy and rewarding baking can be. So, dust off your bread machine, gather your pantry staples, and get ready to experience the pure, unadulterated joy of warm, homemade bread.
